

This guide will help you How to Set Your DeadPoly Server to Private or Public
Click here to order your DeadPoly server from Citadel today!
Configuring your DeadPoly server's visibility allows you to control how players discover and access your server. Whether you want to create a private gaming environment for friends and invited players or open your server to the wider DeadPoly community, choosing the appropriate visibility setting is an important step in managing your dedicated server. Setting up your server according to your preferences can help you create a more enjoyable and organized multiplayer experience for everyone involved. A public server is generally suitable for communities that want to attract new players and allow others to discover their server through the available server browser. This option is ideal for building a larger player base, meeting new players, and creating an active multiplayer community. On the other hand, a private server is better suited for players who prefer a more controlled environment, such as a server dedicated to friends, a small gaming group, or a community with restricted access. Depending on the available server settings, additional access controls may be necessary to ensure that only your intended players can join. In this guide, we will walk you through the process of configuring your DeadPoly server to be private or public through your game server control panel. You will learn how to locate the relevant configuration parameter, adjust it to match your preferred visibility setting, and apply the changes so that your server uses the updated configuration. Before making any changes, we recommend stopping your server to prevent potential configuration conflicts and ensuring that you save your changes before restarting it. By following these instructions, you can configure your DeadPoly server's visibility to suit your needs, whether you are hosting a private multiplayer session or creating a public server for the wider gaming community. Please note that server visibility and access restrictions may be controlled by separate settings, so you may need to configure additional options if you want to limit who can join your server.
Configuring Your DeadPoly Server's Privacy Settings
1. Log in to your Game Control Panel.
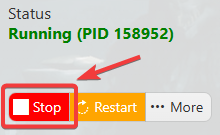
2. Before making any modifications, stop the server from running by clicking the Stop button.
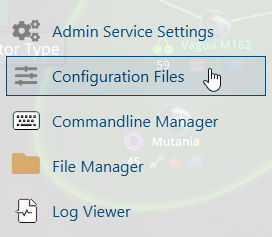
3. Navigate to the Configuration Files section.
4. In Configuration Files, look for the Game.ini file and click the Config Editor beside the Text Editor.

5. In the Config Editor, locate the Private Settings parameter and adjust its value according to your preference to set your DeadPoly server to either private or public.
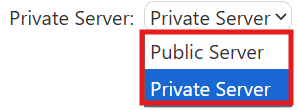
Set it to False to make your server public and visible in the in-game server list, or True to make it private.
Private servers will not appear in the server list, so players must use the Direct Connect option in-game and enter the server's IP address and port to join.
6. After editing, click Save to apply the changes.

If you prefer to modify the server name directly within the configuration file instead of using the UI, click Text Editor next to Config Editor and make your changes there.

You can now start playing on your server.
Did the above information not work for you?
Please click here to contact our support via a ticket.