
Click here to order your 7 Days to Die server with Citadel Servers today!
This guide will show you how to add xml mods.
1. Log in to your Game Control Panel, locate File Manager, and click it then navigate to Data\Config.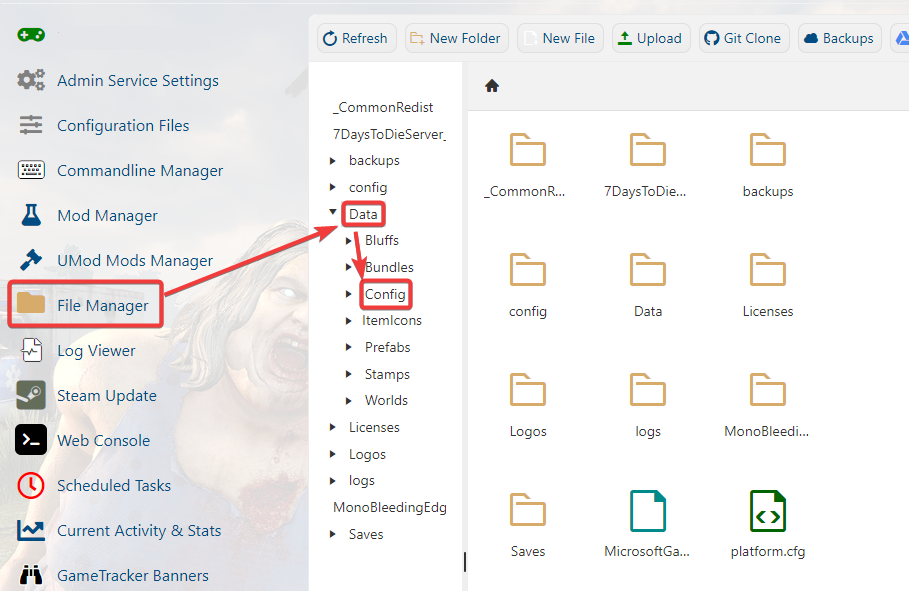
2. Within this config folder is a series of .xml files that have to be edited to add XML mods.
3. In this example we will use the items.xml but the basic rule applies to all the files.
Copy the mod code provided.<item id="1972" name="lokiStew"> <property name="Extends" value="meatStew" /> <property name="CustomIcon" value="meatStew" /> <property class="Action1"> <property name="Gain_food" value="40" /> </property></item>4. Open the relevant XML file that corresponds to the code. In this case, it is the items.xml file.
5. Go to the bottom of the file and paste the copied code ABOVE the </items> line that is at the bottom of the file. Always keep the </items> line at the bottom of the file. Not to be confused with </item>.
4. Ensure the item ID used by the copied code is not being used by any other item unless the mod specifically wants you to replace vanilla. It must have a unique ID number assigned to it.
These rules are nearly identical for any mod code you add.
Did the above information not work for you?
Please click here to contact our support via a ticket.
