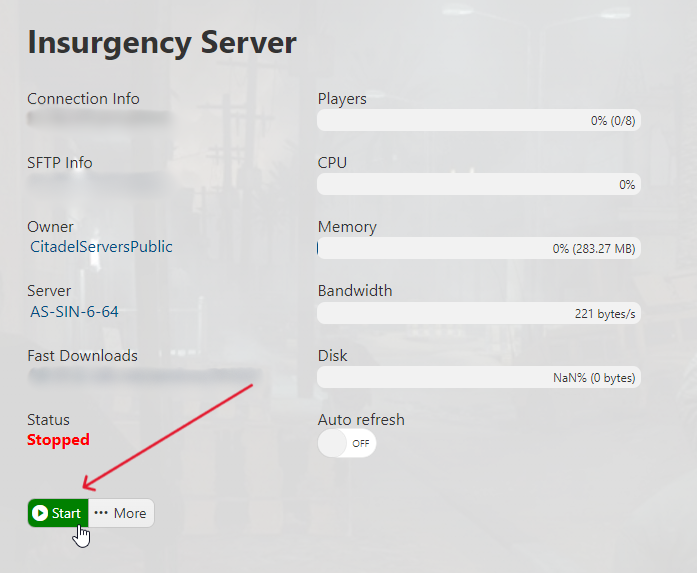
1. First and foremost, login and access your game panel and navigate to your Insurgency server. Make sure it's not running. If it is, press the "Stop" button.

2. Go to the 'File Manager' section from your control panel.
banned_ip.cfg banned_user.cfg

exec banned_user.cfg // personal banlist based on user IDs exec banned_ip.cfg // personal banlist based on user IPs writeid writeip7. Head back to your game panel and press "Start" to start your server.
1. To use the server console, go to the Web Console section of your server:
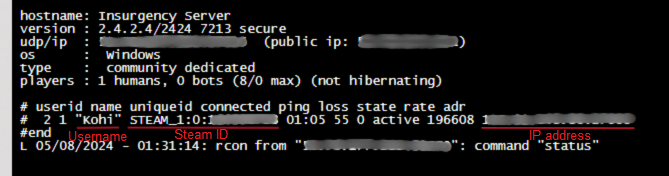
2. Type in your Rcon password and press Enter. Then type in "status" and it should show up the following lines, showing information of the server and the players connected:
3. If you choose the in-game console, once you're connected to the server, press the `(tilde key) on your keyboard. Type in rcon_password <your rcon password> then press Enter. Then type in status once again and it should show up the following lines, showing information of the server and the players connected:
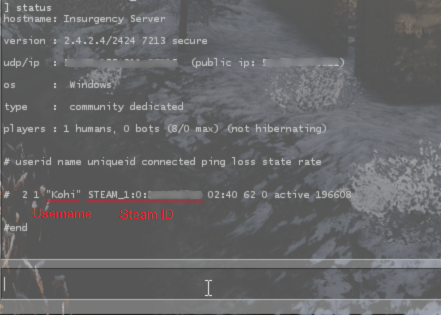
Take note of the players' IP address or SteamID, following format: STEAM_x:x:xxxxxxxx where “x” stands for numbers.
KICK, BAN, AND UNBAN COMMANDS:
- Kicking:
kick <name>kickid <id>
Explanation: <name> is user name <id> is SteamID and have following format: STEAM_x:x:xxxxxxxx where “x” stands for number
Examples: kick arc kickid STEAM_0:0:12345678
- Adding/removing banned users/ips through console (works also via RCON):
Adding/removing IP:
addip <time> <ip> removeip <ip>Explanation:
<time> how many MINUTES will be IP banned, 0 = permanent ban <ip> stands for numeric IPv4 address of user (example: 1.2.3.4)removeip does not need <time> parameter
Examples:
addip 0 10.10.10.11 removeip 1.2.3.4- Adding/removing steamID:
banid <time> <id>removeid <id>
Explanation:<time>how many MINUTES will be IP banned, 0 = permanent ban<id>is SteamID and have following format: STEAM_x:x:xxxxxxxx where “x” stands for number
Examples:banid 0 STEAM_0:0:12345678removeid STEAM_0:0:87654321 - To write banned IPs/IDs to a file, type this command into the console depending of what you’ve banned:
writeidwriteip
- To view banned IDs or IPs through console, use those resepctive commands:
listidlistip
Explanation: listid - will show you how many IDs are banned, exact IDs and for how long listip - will show you how many IPs are banned, exact IPs and for how long
