
This article will aid you in updating your Minecraft server.
Click here to order your Minecraft server with Citadel today!
Follow these steps below to update your Minecraft to the latest version available!
Note: If you are planning to use an older version, proceed to Step 2.
Install the correct Java from the Mod Manager for that specific version of Minecraft.
Otherwise, proceed to Step 1 for the latest version available.
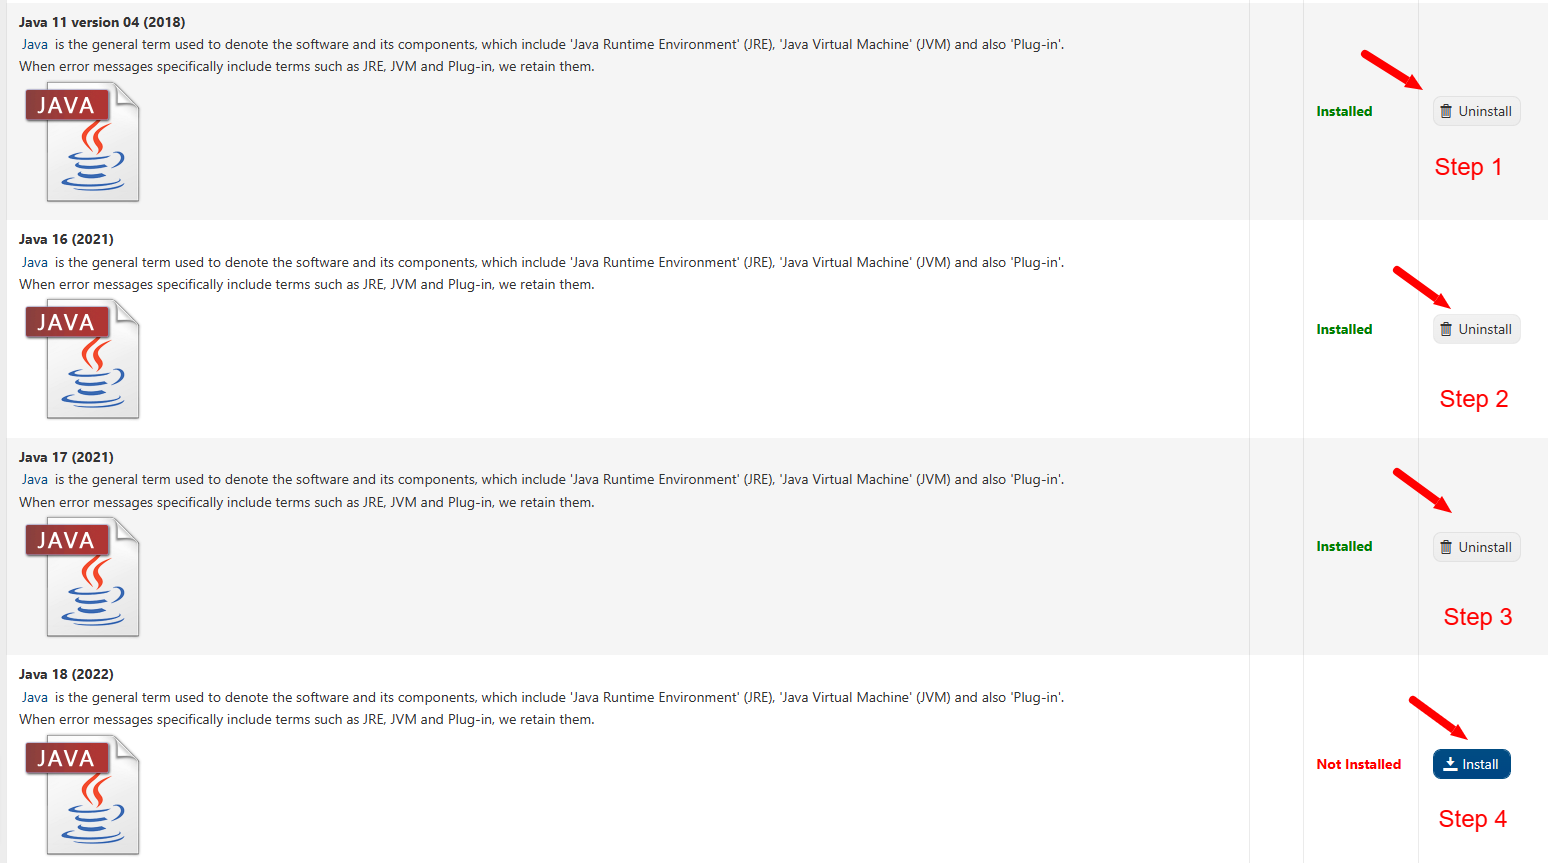
Step 1: While logged in on your Game Panel(click this link for easy access), go to the Mod Manager section.
(Remove all the previous Java versions from the Java section, and install the latest available Java)
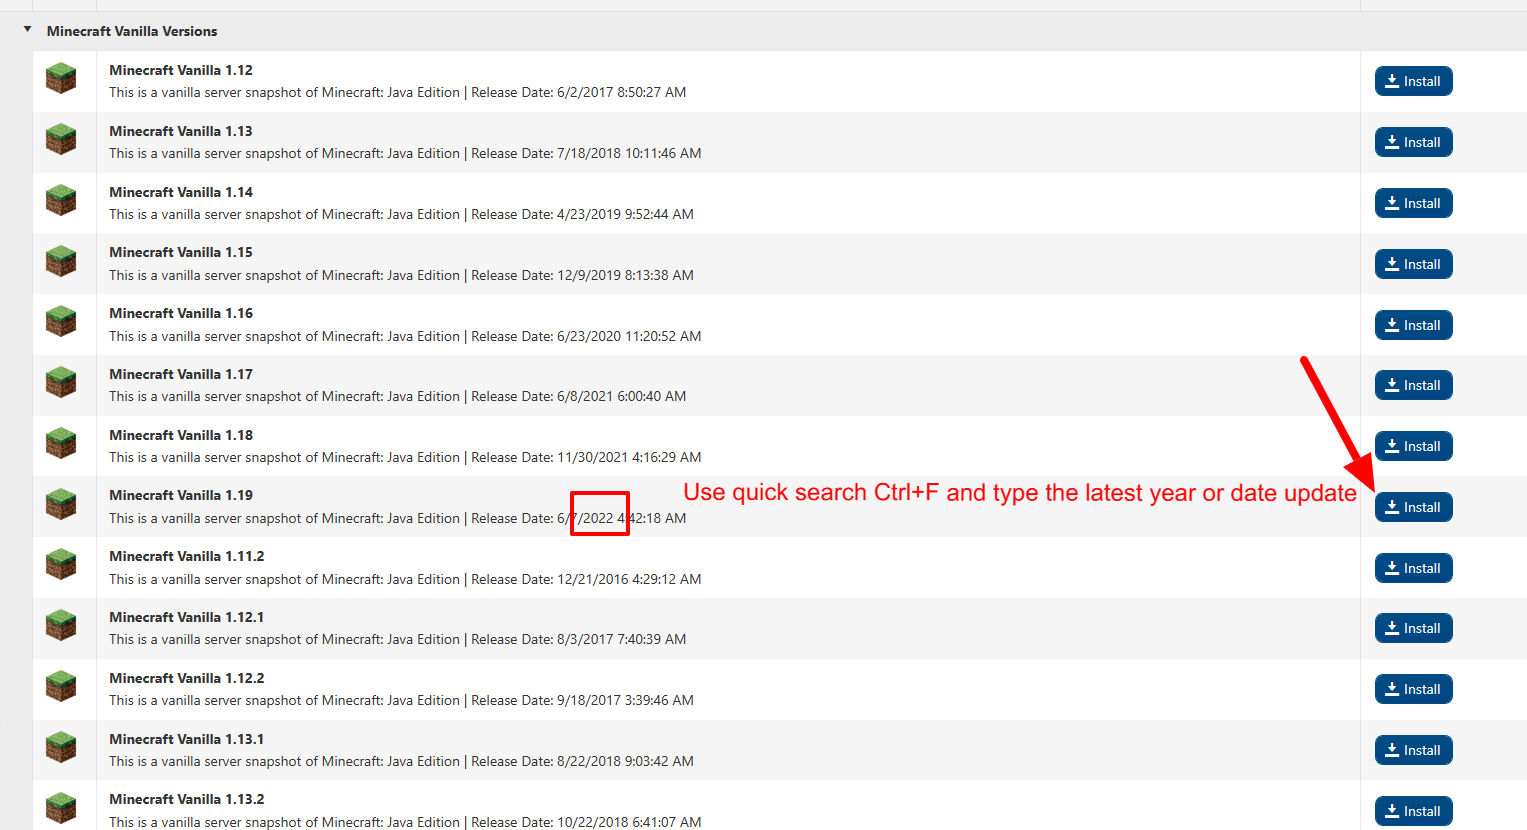
Step 2: Go to the "Updates" section from the left side panel.
(Select the latest version or your preferred version)
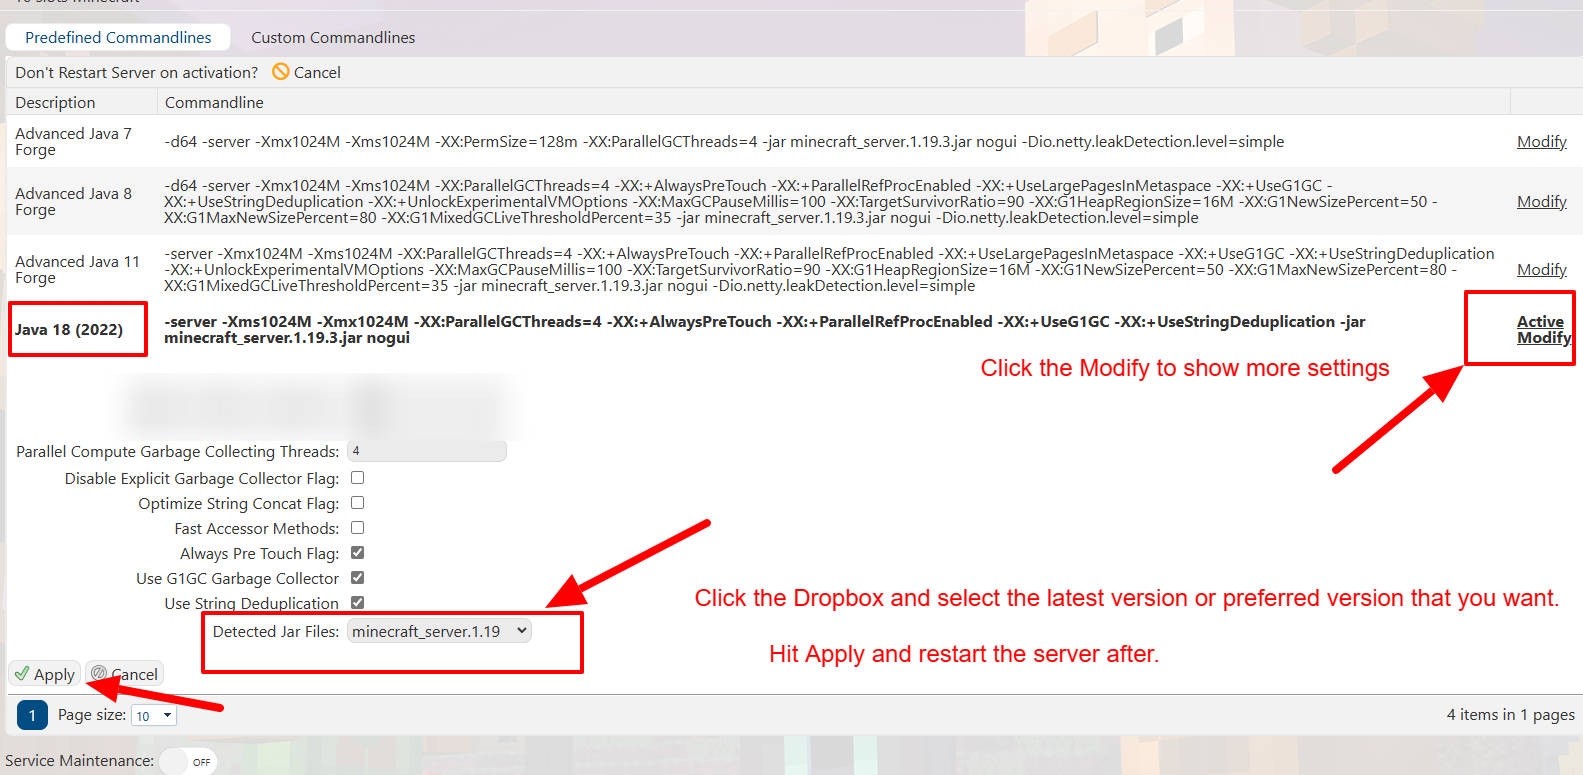
Step 3: Go to the Commandline Manager from the left side panel, select the latest version, and click the "Modify" option.
(From the Detected Jar Files, click the drop box, and select the latest version that you have installed from the Updates.)
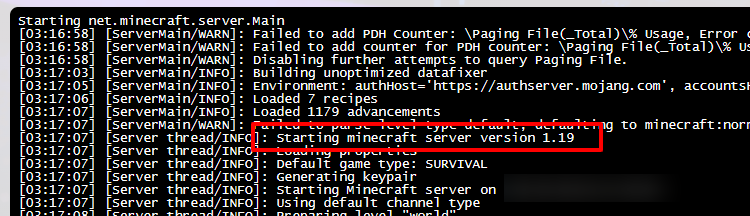
Step 4: Go back to the home page of your Game Panel(click this link for easy access), and click "START"
(Once the server status is Running, go to the Web Console, and observe the server progress with the correct version)
Step 5: Join the server before you add or change anything.
(That should run your server to the latest version of the game)
