
The following guide will teach you how to install Exile to your ARMA 3 server.
NOTE: You will need to stop your server before making any of these changes.
You will need the following tools to install and setup Exile for your ARMA 3 server:
Notepad++: https://notepad-plus-plus.org/download/v6.8.7.html (Very effective tool in editing Exile configuration files)
PBO Manager: http://www.armaholic.com/page.php?id=16369 (Great tool to extract necessary game files for editing)
Installing Exile
Navigate to the "Mod Manager" in the control panel.
Install "Exile v1.0.3 - Lemon" under the "Exile" category.

Navigate to the "Commandline Manager" in the control panel.
Press "ACTIVE" next to your command line.
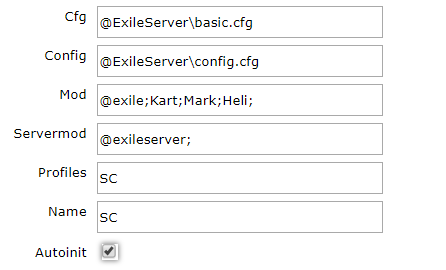
Make the following changes, as shown in the image below:
Cfg: @ExileServer\basic.cfg
Config: @ExileServer\config.cfg
Mod: @exile;Kart;Mark;Heli;
Servermod: @exileserver;
Profiles: SC
Name: SC
Autoinit: ✓ (Ticked)
Config: @ExileServer\config.cfg
Mod: @exile;Kart;Mark;Heli;
Servermod: @exileserver;
Profiles: SC
Name: SC
Autoinit: ✓ (Ticked)
Press "Apply" to save your changes.
Navigate to the "File Manager" in the control panel.
Navigate to the "@ExileServer" folder.
Navigate to the "@ExileServer" folder.
Download "config.cfg".
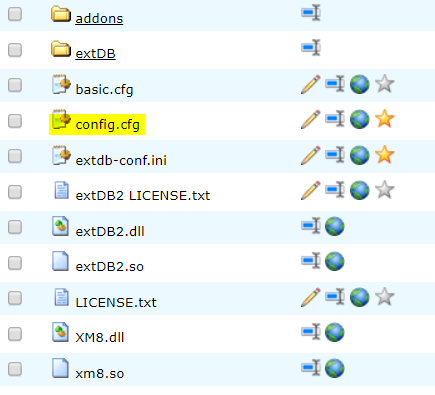
Open "config.cfg" with Notepad++ and modify the following fields to your liking:
Open "config.cfg" with Notepad++ and modify the following fields to your liking:
hostname - Your server name that will be represented online
password - Use only if you wish to password protect your server
passwordAdmin - Used for admin functions ingame
serverCommandPassword - Used to access server settings
maxPlayers - Server player limit (NOTE: You are not allowed to set this to a higher number than the amount of slots you are paying for, if you attempt to do so your server will be disabled)
persistent - Should be set to "1" for the use of autoinit in you server launch commands
You will also need to change "requiredBuild" to "133741", you will need to adjust this with each ARMA 3 update.
After you've made these changes, delete the old "config.cfg" and upload your modified version.

Navigate back to "@ExileServer" and download "extdb-conf.ini"
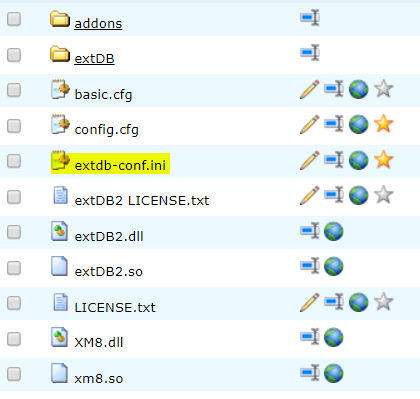
Open "extdb-conf.ini" with Notepad++ and change the following fields accordingly:
[exile]
Type = MySQL (This should remain the same)
Name = exile (Schema name for Exile database)
Username = busybee (Your MySQL Username)
Password = abc123! (Your MySQL Password)
IP = 127.0.0.1 (Your MySQL Host)
Type = MySQL (This should remain the same)
Name = exile (Schema name for Exile database)
Username = busybee (Your MySQL Username)
Password = abc123! (Your MySQL Password)
IP = 127.0.0.1 (Your MySQL Host)
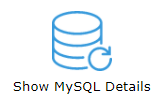
You can get these details by pressing "Show MySQL Details" in the control panel.
After you've made these changes, delete the old "extdb-conf.ini" and upload your modified version.
After you've made these changes, delete the old "extdb-conf.ini" and upload your modified version.
Navigate to "@ExileServer/addons" and download "exile_server_config.pbo"


After downloading it, right click the file and select "Extract to exile_server_config\" in the PBO Manager menu.

Navigate to the newly created "exile_server_config" folder.

Open "config.cpp" with Notepad++ and scroll to the line below sections of the document and edit the fields as you require:
CONSTRUCTION: Line 2705-2721
territoryLifeTime = 7 (Days before unpaid territory is removed)
constructionLifeTime = 2 (Days before construction outside of territory gets removed. Workbench for example)
containerLifeTime = 7 (Days before territory containers are removed)
vehicleLifeTime = 3 (Days before unused vehicles are removed)
constructionLifeTime = 2 (Days before construction outside of territory gets removed. Workbench for example)
containerLifeTime = 7 (Days before territory containers are removed)
vehicleLifeTime = 3 (Days before unused vehicles are removed)
VEHICLES: Line 2955-3039
vehiclesGridSize = 2200 (Grid size for vehicles spawns)
vehiclesGridAmount = 2 (Amount of vehicles to spawn in each grid configured above)
vehiclesDebugmarkers = 0 (Creates global markers for debugging)
damageChance= 20% (Chance for a vehicle HITPOINT to be damaged)
maximumDamage = 0.9 (Total amount of damage that can be applied when spawning a vehicle)
vehiclesGridAmount = 2 (Amount of vehicles to spawn in each grid configured above)
vehiclesDebugmarkers = 0 (Creates global markers for debugging)
damageChance= 20% (Chance for a vehicle HITPOINT to be damaged)
maximumDamage = 0.9 (Total amount of damage that can be applied when spawning a vehicle)
NOTE: If you wish to add vehicles to the spawn list add them to the water and ground sections (Lines 2966-3028). Make sure to remove the "," behind the last vehicle entry!
nightVision = 1 (Enables or disables night vision optics on ALL vehicles)
thermalVision = 0 (Enables or disables thermal optics on ALL vehicles)
unlockInSafeZonesAfterRestarts = 0 (Set this to 1 to unlock vehicles on server boot if they are in safe zones)
unlockInSafeZonesAfterRestarts = 0 (Set this to 1 to unlock vehicles on server boot if they are in safe zones)
SERVER SETTINGS: Line 3129-3191
serverPassword = * (Use serverCommandPassword that you set in "config.cfg" earlier)
useAutoLock = 1 (Autolocks server until its ready to accept players)
restartAutoLock = 3 (Server will autoLock at that time before restart)
restartTimer[] = {3,0} (Number of hours and minutes of your restart period)
useAutoKick = 1 (Kicks players before restart to prevent gear loss)
kickTime = 2 (Time before restart that server kicks players)
useRestartMessages = 0 (Notifies players of server restart)
restartWaringTime[] = {15, 10, 5, 3} (Number of minutes before the restart to inform your players)
useShutdown = 1 (Forces server to shut down and close completely)
After you've made these changes, right click the "exile_server_config" folder and select "Pack into exile_server_config.pbo" in the PBO Manager menu.
You can now delete the "exile_server_config" folder.
Delete the old "exile_server_config.pbo" and upload your modified version.
Setting up the MySQL database
Navigate to the "File Manager" in the control panel.
Download "exile.sql".
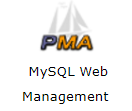
Navigate to "PhpMyAdmin" in the control panel.
Navigate to "Databases".
Navigate to "PhpMyAdmin" in the control panel.
Navigate to "Databases".

Navigate to the database you'll be using for Exile.

Navigate to "Import".

Press "Browse..." and select the "exile.sql" file that you downloaded earlier.
After the file has finished uploading, press "Go".
And that's it, you've now finished installing and setting up Exile for your ARMA 3 server! You can now start your server again.
If you need any further help or if something is unclear to you, feel free to contact our support team and we'll help you out.
Navigate to "Import".
Press "Browse..." and select the "exile.sql" file that you downloaded earlier.
After the file has finished uploading, press "Go".
And that's it, you've now finished installing and setting up Exile for your ARMA 3 server! You can now start your server again.
If you need any further help or if something is unclear to you, feel free to contact our support team and we'll help you out.
